云服务器配置部署Nginx开发环境
当初买ECS的初衷就是想搭建自己的博客,记录一些学习和生活的笔记,有了自己的域名和服务器以后就可以搭建属于自己的博客了,域名需要先行备案和解析到服务器,现在流行的静态博客(hexo、vuepress)都是基于Nginx服务器的,所以需要先在服务器安装和配置Nginx环境。
1、安装Nginx
安装Nginx很简单,只需一条命令即可,先ssh登录服务器,然后使用以下命令安装:
yum install -y nginx
2、配置Nginx
Nginx的配置文件默认在/etc/nginx/目录下,使用命令 vim /etc/nginx/nginx.conf 编辑配置文件添加以下 配置:
## For more information on configuration, see:
#   * Official English Documentation: http://nginx.org/en/docs/
#   * Official Russian Documentation: http://nginx.org/ru/docs/

user nginx;
worker_processes auto;
error_log /var/log/nginx/error.log;
pid /run/nginx.pid;

# Load dynamic modules. See /usr/share/doc/nginx/README.dynamic.
include /usr/share/nginx/modules/*.conf;

events {
    worker_connections 1024;
}
# For more information on configuration, see:
#   * Official English Documentation: http://nginx.org/en/docs/
#   * Official Russian Documentation: http://nginx.org/ru/docs/

user nginx;
worker_processes auto;
error_log /var/log/nginx/error.log;
pid /run/nginx.pid;

# Load dynamic modules. See /usr/share/doc/nginx/README.dynamic.
include /usr/share/nginx/modules/*.conf;

events {
    worker_connections 1024;
}

http {
    log_format  main  '$remote_addr - $remote_user [$time_local] "$request" '
                      '$status $body_bytes_sent "$http_referer" '
                      '"$http_user_agent" "$http_x_forwarded_for"';

    access_log  /var/log/nginx/access.log  main;
    proxy_hide_header X-Powered-By;
    sendfile            on;
    tcp_nopush          on;
    tcp_nodelay         on;
    keepalive_timeout   65;
    types_hash_max_size 2048;

    include             /etc/nginx/mime.types;
    default_type        application/octet-stream;

    # Load modular configuration files from the /etc/nginx/conf.d directory.
    # See http://nginx.org/en/docs/ngx_core_module.html#include
    # for more information.
    include /etc/nginx/conf.d/*.conf;

    server {
                # http配置
        listen       80 default_server;
        listen       [::]:80 default_server;
                # 域名
        server_name  xing666.net;
                server_tokens off;
                # 静态页面路径,请根据自己的静态页面放置路径填写
        root         /home/blog;

        # Load configuration files for the default server block.
        include /etc/nginx/default.d/*.conf;

        location / {
        }

        error_page 404 /404.html;
            location = /40x.html {
        }

        error_page 500 502 503 504 /50x.html;
            location = /50x.html {
        }
    }

# Settings for a TLS enabled server.
#
    server {
                # https配置
        listen       443 ssl http2 default_server;
#       listen       [::]:443 ssl http2 default_server;

                # 域名
        server_name  xing666.net;
               server_tokens off;
                # 静态页面路径,请根据自己的静态页面放置路径填写
        root         /home/blog;
        index index.html index.htm;
#
#        # Load configuration files for the default server block.
#        include /etc/nginx/default.d/*.conf;
#
        location / {
                  root /home/blog;
                  index index.html;
        }
#
#        error_page 404 /404.html;
#            location = /40x.html {
#        }
#
#        error_page 500 502 503 504 /50x.html;
#            location = /50x.html {
#        }
    }
}
以上配置只是一个示例。
3、检查配置并启动Nginx服务
检查Nginx语法:nginx -t
启动Nginx服务:nginx start
查看80和443端口是否被监听:netstat -ntpl|grep 80 netstat -ntpl|grep 443
配置好Nginx后,进行Nginx语法检查,检查通过后启动或者重载Nginx服务器,并查看80和443端口是否被监听,上述操作都顺利通过后,服务器环境就搭建完成了。
4、设置安全端口
在安全规则的入口方向,添加80、8080、443端口的允许访问规则,如图

5、开放防火墙端口
如果启动的服务器的防火墙,还需要开放防火墙的80、8080、443端口,具体步骤如下:
查看防火墙规则:firewall-cmd --list-all
开放防火墙端口(以80端口为例):firewall-cmd --permanent --add-port=80/tcp
重启防火墙:firewall-cmd --reload
如果域名解析已完成,到这一步就可以访问博客了,接下来说说如何配置https。浏览器默认http访问是不安全的,所以很多人都想开启https,开启https的前提是需要有SSL证书,个人购买推荐阿里云的Symantec免费证书,具体操作如下:
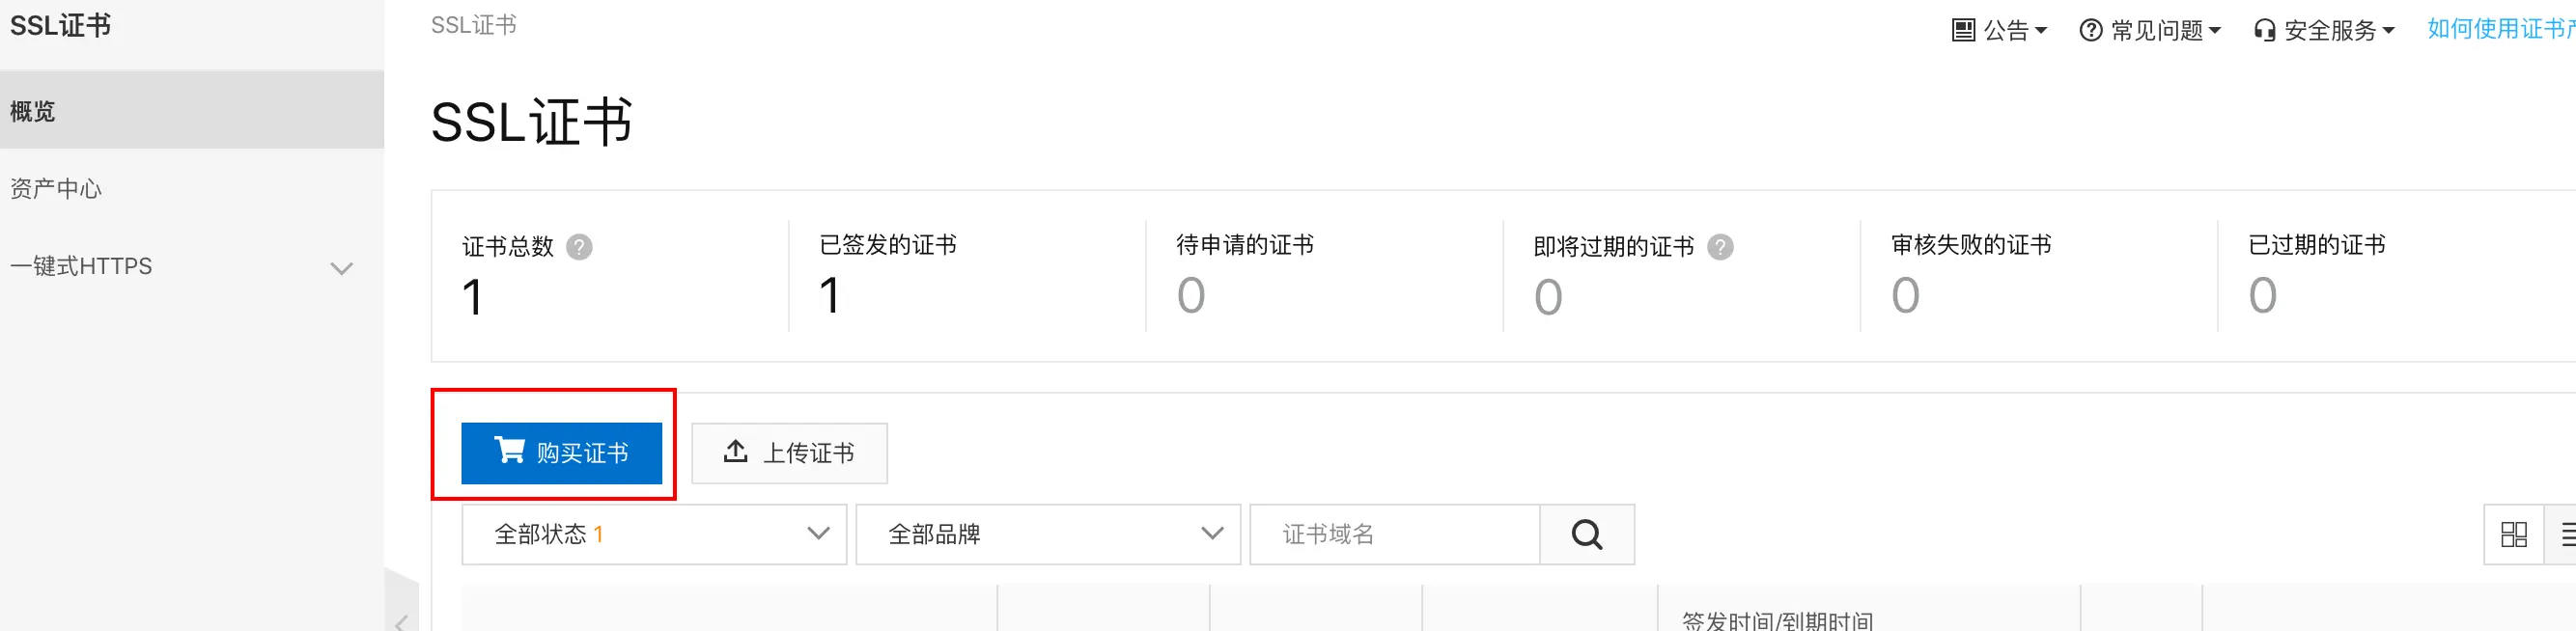
6、购买SSL证书
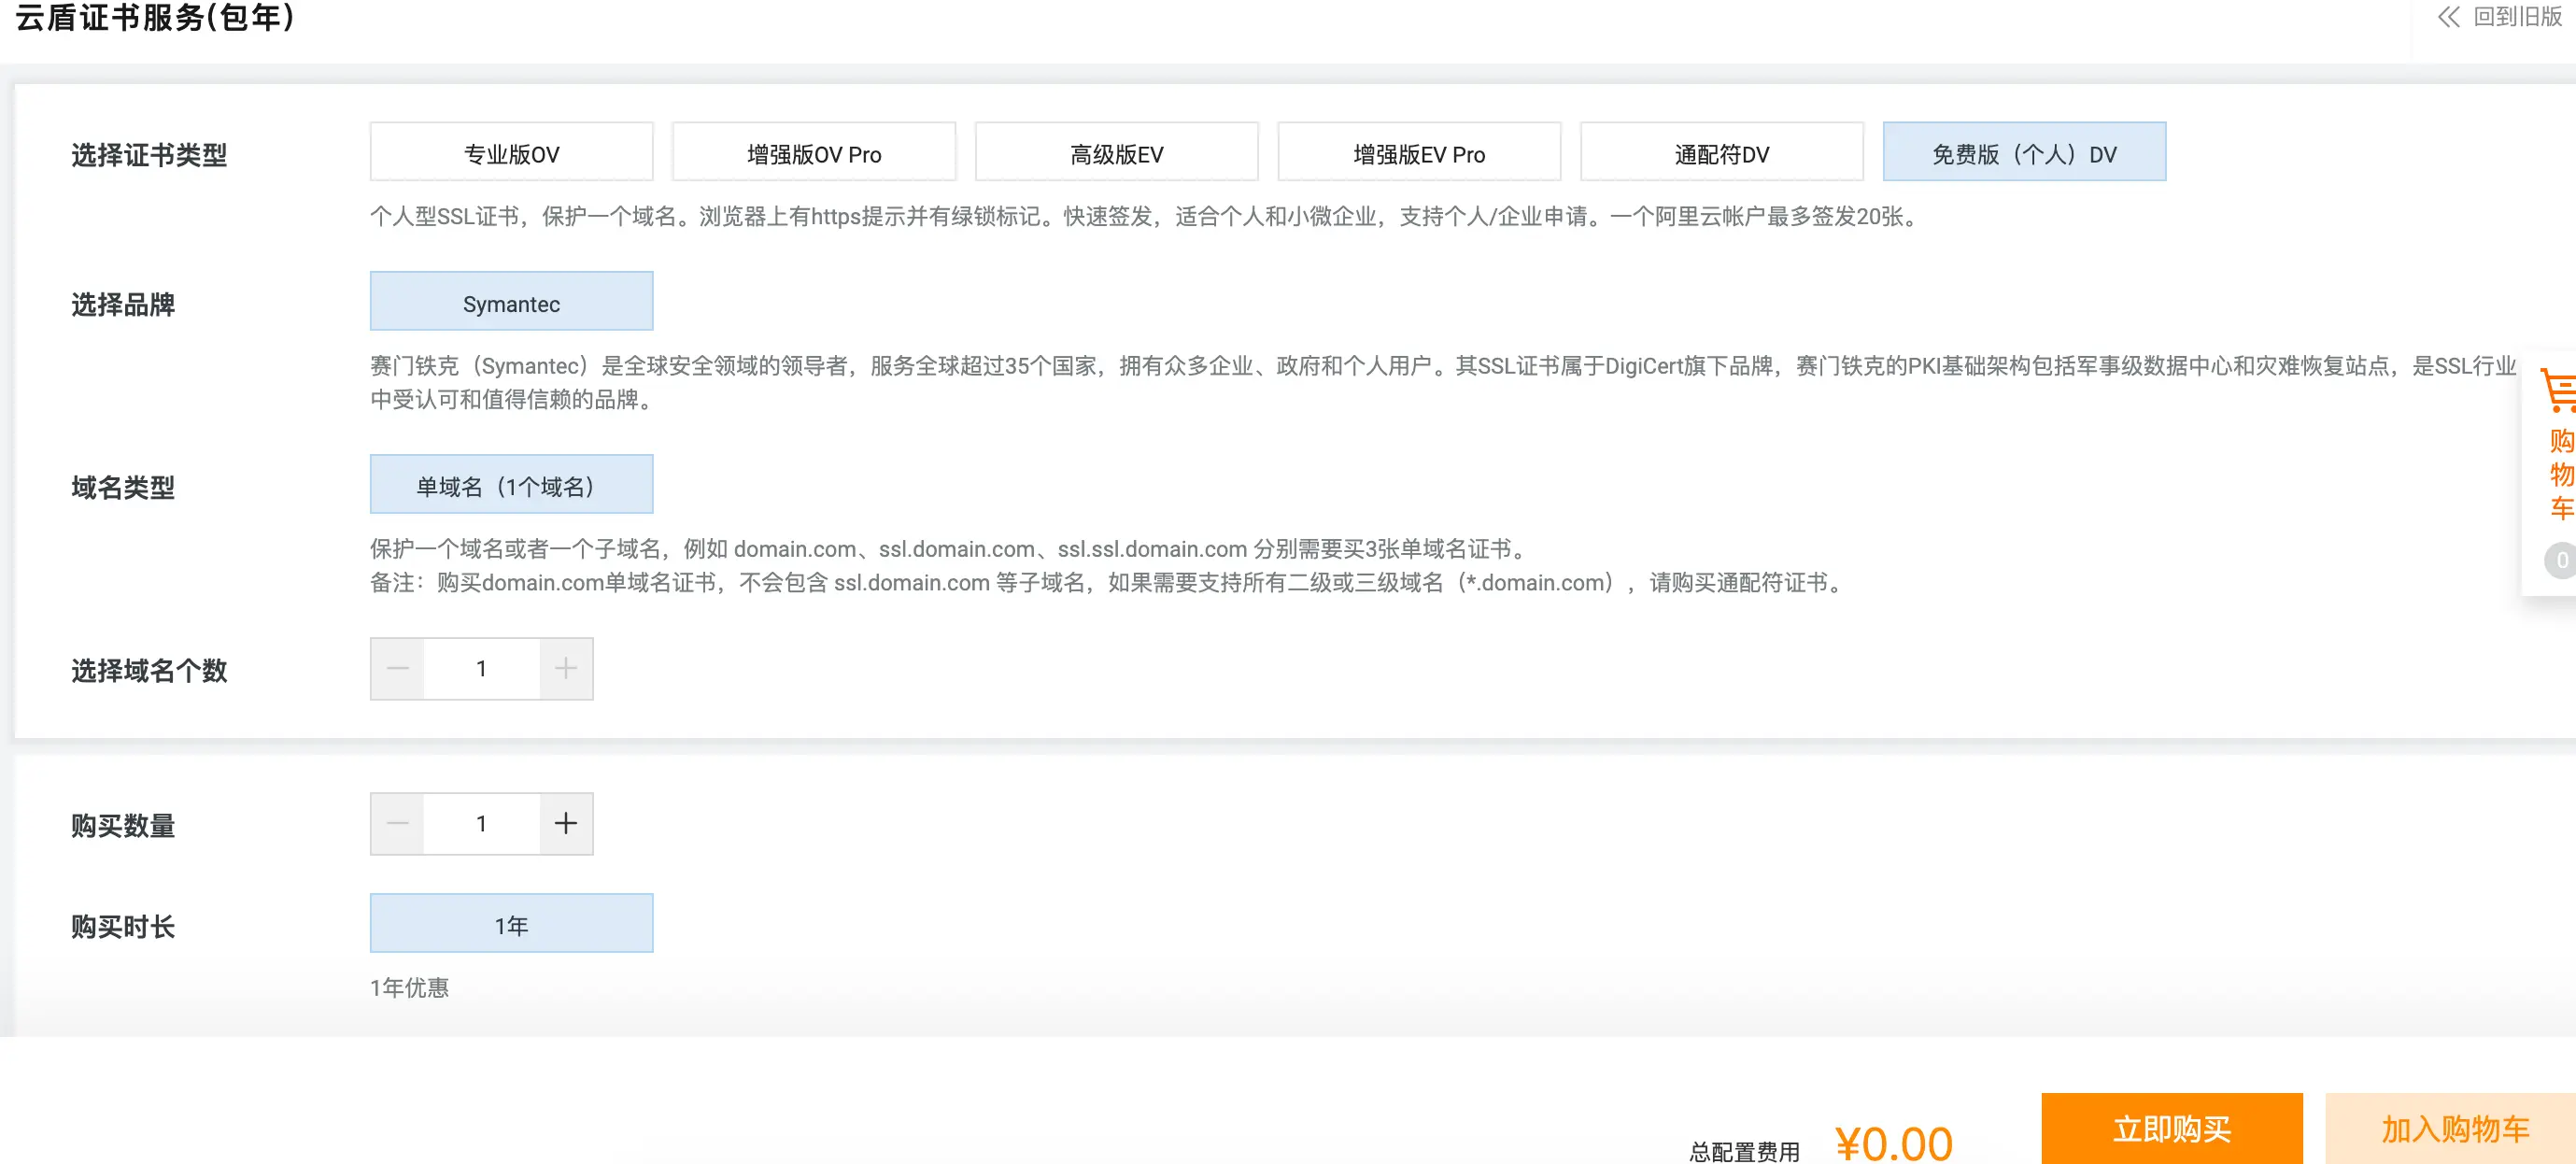
进入阿里云控制台找到SSL证书菜单,点击购买证书,选择免费版(个人)DV进行购买
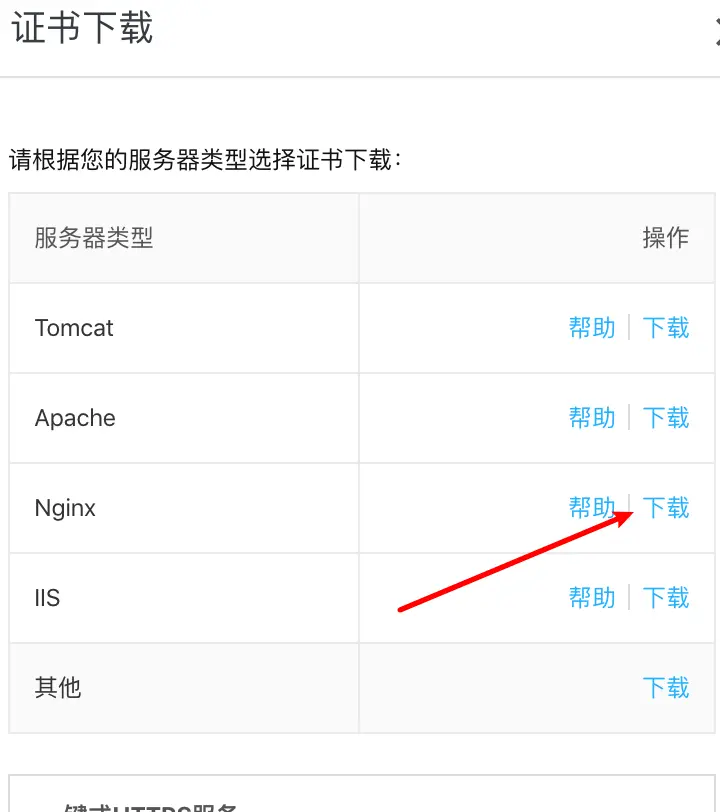
7、下载SSL证书
购买成功以后就可以在SSL证书里看见自己的证书了,先绑定自己的域名,然后点击右边的下载按钮,选择Nginx版下载。

下载的证书有两个文件,一个是.key格式的,一个是.pem,在服务器上/etc/nginx/nginx.conf同级目录下新建一个cert文件夹,使用scp命令将两个文件放进去。
scp 本地下载后的目录/a.pem root@云服务器ip:/etc/nginx/cert
scp -P 10022 /Users/xingfei/Desktop/www-xing666-net-nginx-0901112413/www.xing666.net_chain.crt root@云服务器ip:/etc/nginx/cert/
8、Nginx配置SSL证书
打开nginx.conf配置文件,在https server里添加如下配置:
server {
        listen       443 ssl http2 default_server;
        server_name  xing666.net;
           server_tokens off;
        root         /home/blog/html;
        index index.html index.htm;
              # SSL配置
        ssl_certificate "/etc/nginx/cert/文件名.pem";
        ssl_certificate_key "/etc/nginx/cert/文件名.key";
        ssl_session_timeout  10m;
        ssl_protocols TLSv1 TLSv1.1 TLSv1.2;
        ssl_ciphers ECDHE-RSA-AES128-GCM-SHA256:ECDHE:ECDH:AES:HIGH:!NULL:!aNULL:!MD5:!ADH:!RC4;
        ssl_prefer_server_ciphers on;

        location / {
            root /home/blog;
            index index.html;
        }
    }
添加完成后检查Nginx语法是否正确,然后重启Nginx服务即可
nginx -t
nginx -s reload
到这里SSL证书配置完成,可以愉快的访问https://www.xing666.net了。
免费SSL证书到期替换
在https://freessl.cn/申请新的证书,然后下载NGINX证书到本地,使用scp命令将新证书上传到/etc/nginx/cert/目录下替换原证书(注意文件名要一样),重启nginx。
然后去又拍云更新证书